How to Check Your Firewall Settings
Open your Start menu.. Type "firewall" into the search bar.. Click the "Windows Firewall" option.
Steps
1
Open your Start menu.
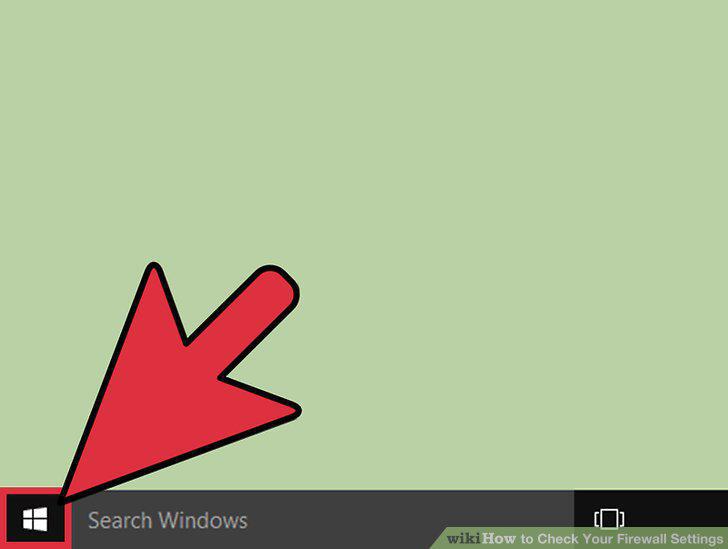
Open your Start menu.
2
Type "firewall" into the search bar.
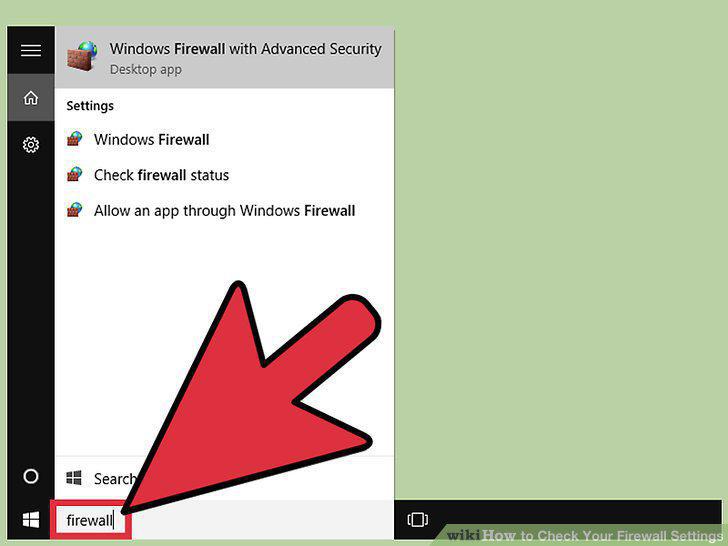
Type "firewall" into the search bar.
3
Click the "Windows Firewall" option.
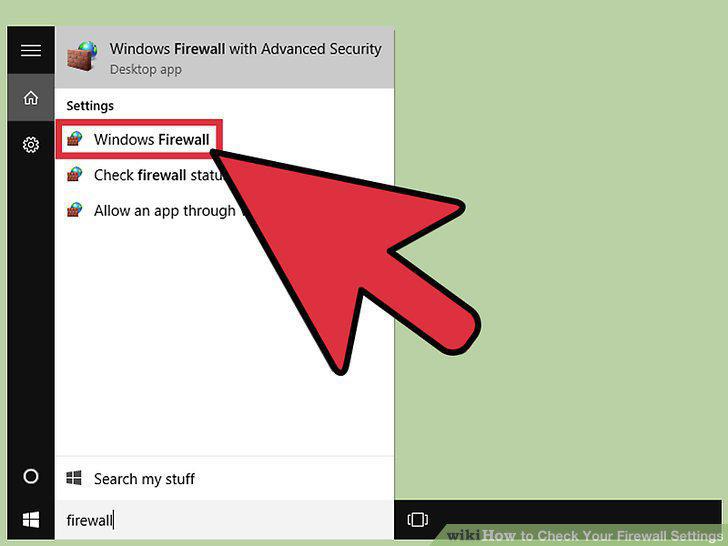
Click the "Windows Firewall" option.
4
Review your firewall settings.
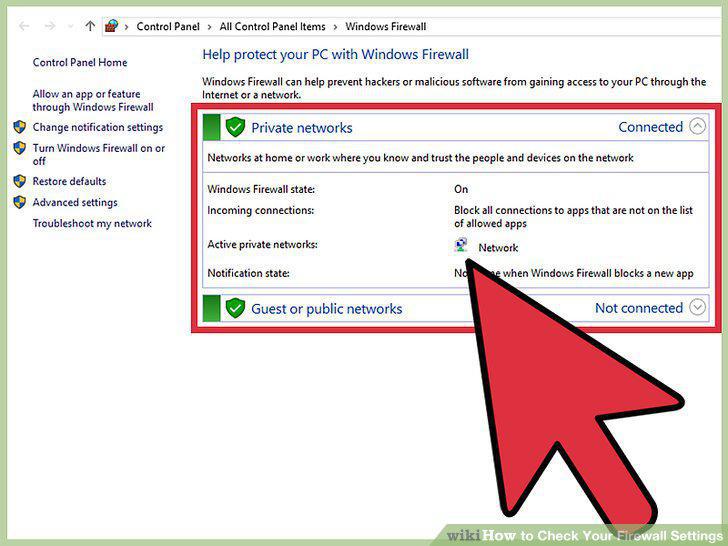
Review your firewall settings.
5
Click the "Advanced Settings" option.
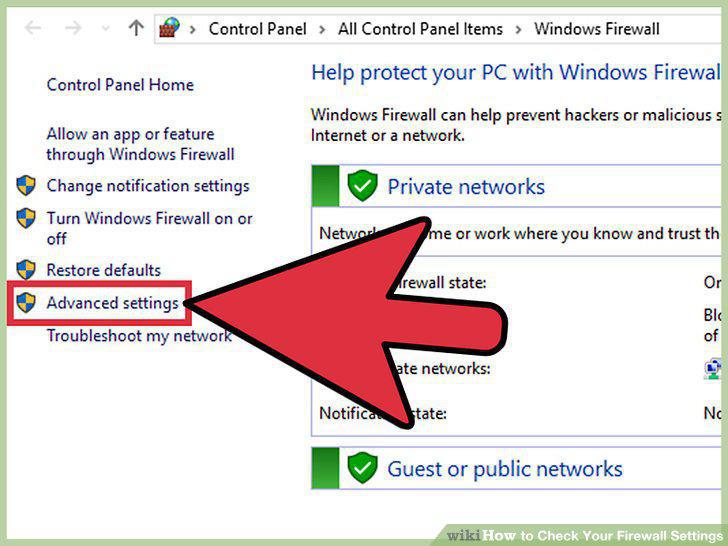
Click the "Advanced Settings" option.
6
Exit the Advanced Settings menu when you're finished.
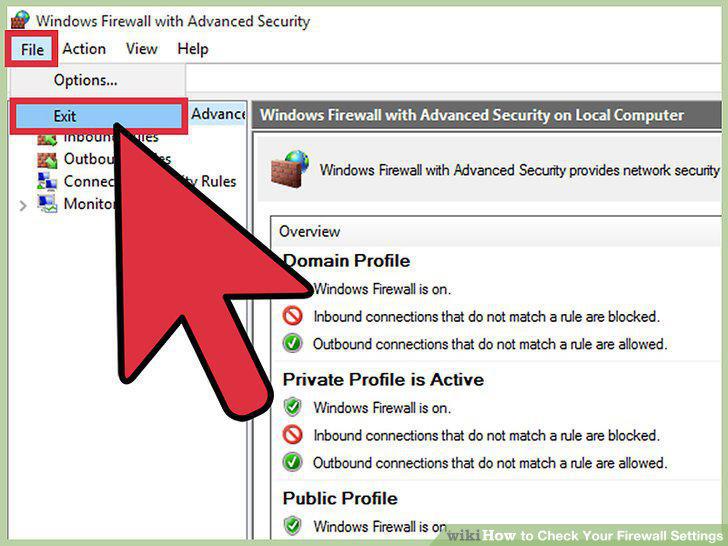
Exit the Advanced Settings menu when you're finished.
7
Click the Apple icon in the top left corner of your screen.
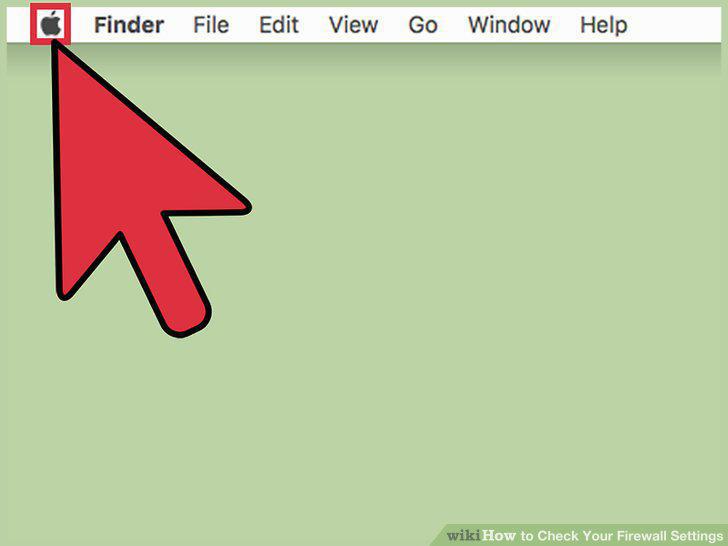
Click the Apple icon in the top left corner of your screen.
8
Click "System Preferences".
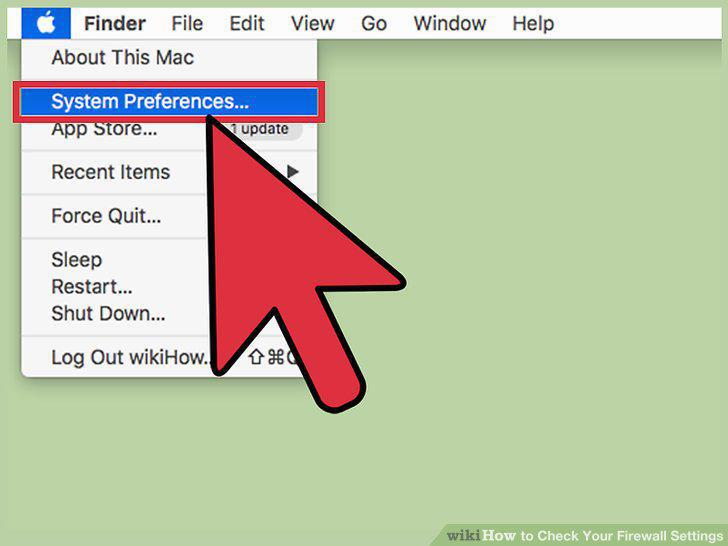
Click "System Preferences".
9
Click the "Security & Privacy" tab.
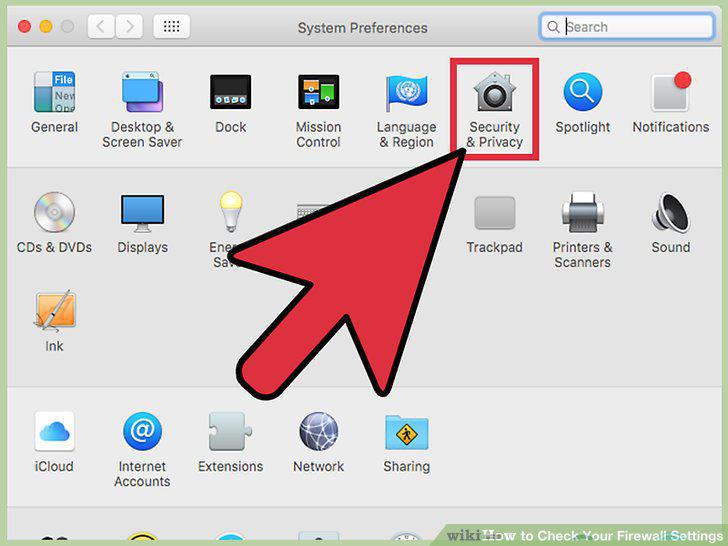
Click the "Security & Privacy" tab.
10
Click the "Firewall" tab.
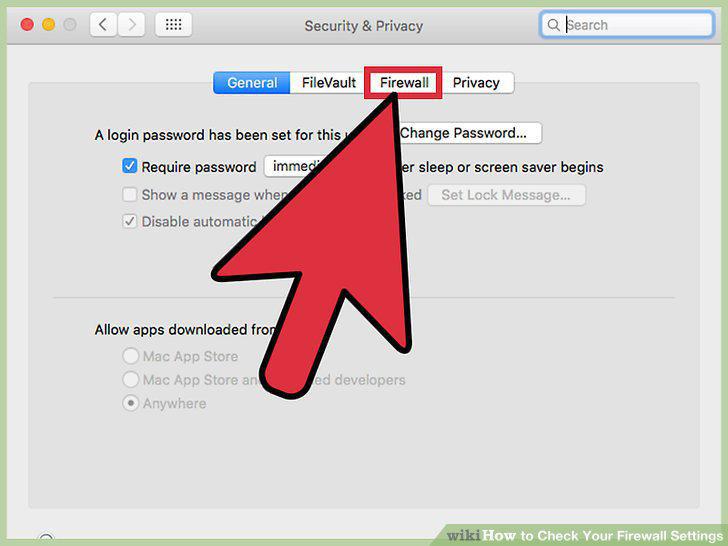
Click the "Firewall" tab.
11
Unlock the Firewall menu.
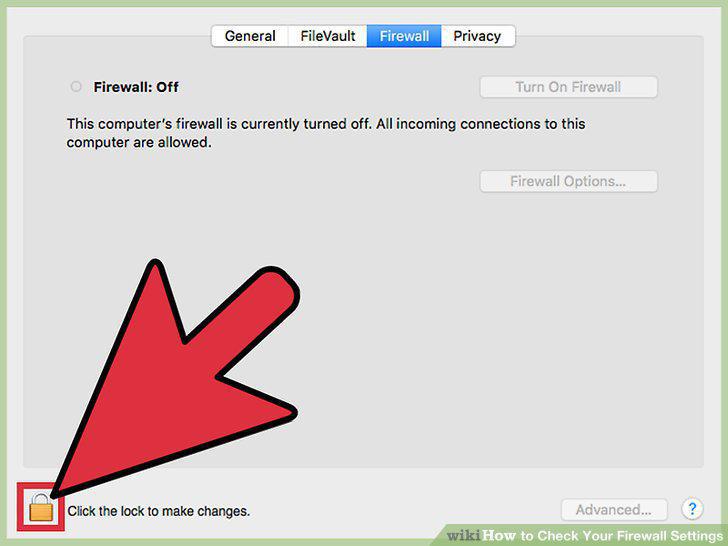
Unlock the Firewall menu.
12
Click "Turn On Firewall" to enable your Mac's firewall.
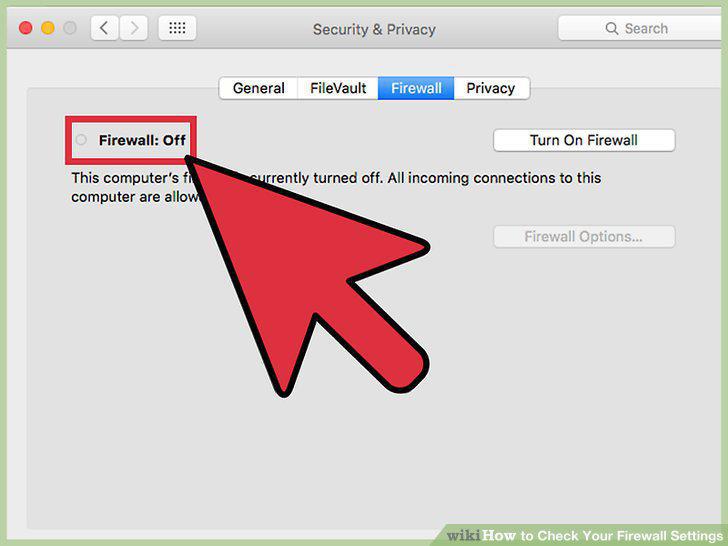
Click "Turn On Firewall" to enable your Mac's firewall.
13
Click the "Firewall Options" button.
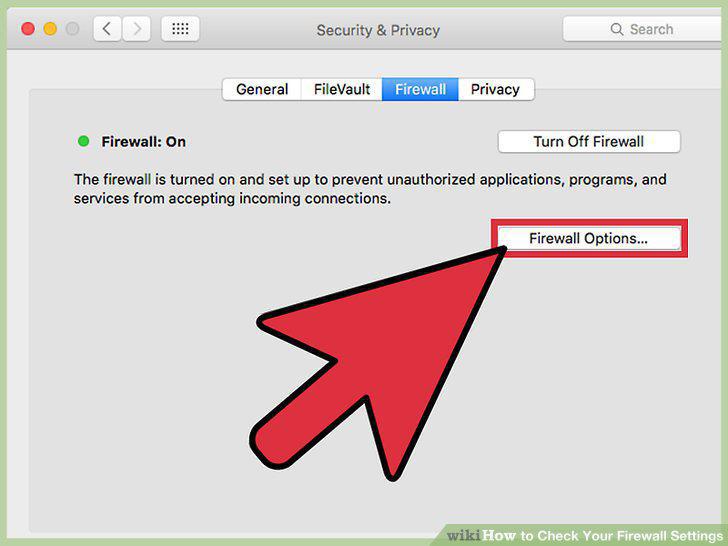
Click the "Firewall Options" button.
14
Add programs to your firewall's block or accept list.
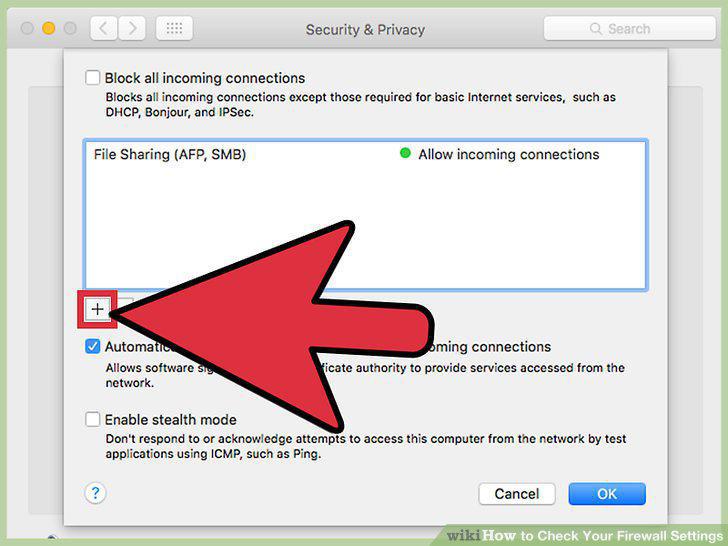
Add programs to your firewall's block or accept list.
15
Click "OK" when you're done.
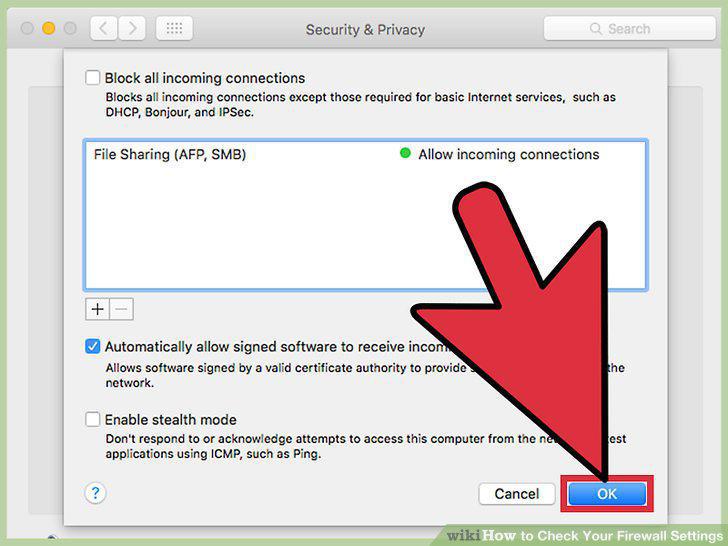
Click "OK" when you're done.
Comments (0)
No comments yet. Be the first to share your thoughts!