How to Make Windows 7 Search File Contents
Open the folder that you want to search.. Click the search bar.. Enter the "content search" prompt.
Steps
1
Open the folder that you want to search.
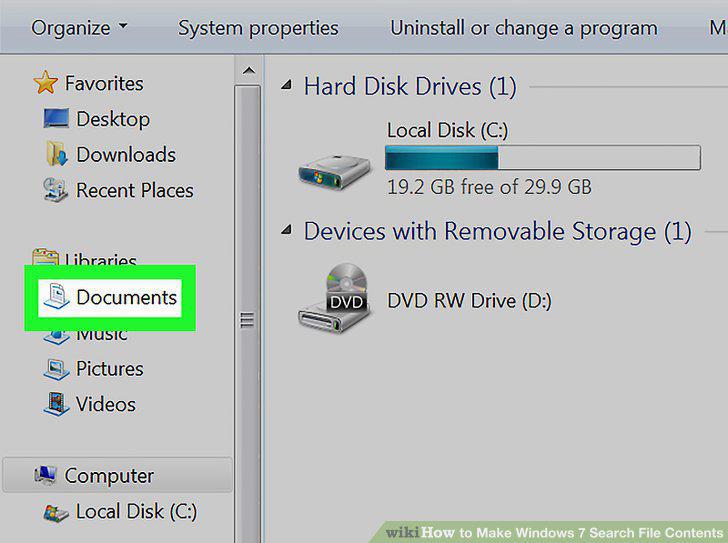
Open the folder that you want to search.
2
Click the search bar.
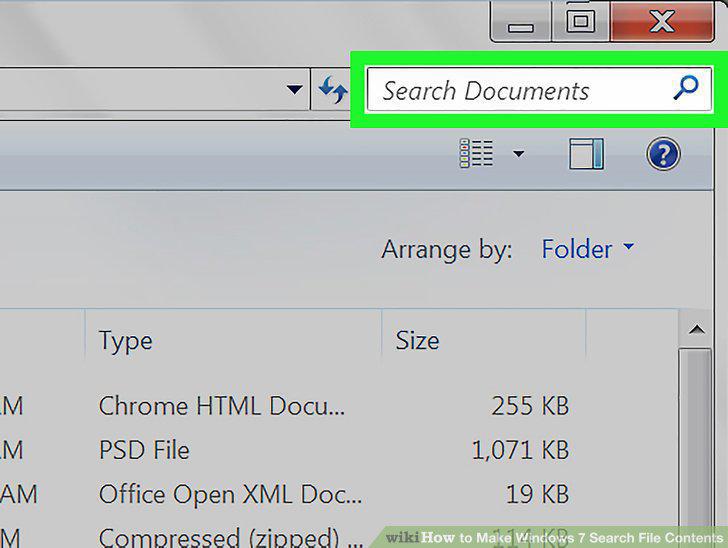
Click the search bar.
3
Enter the "content search" prompt.
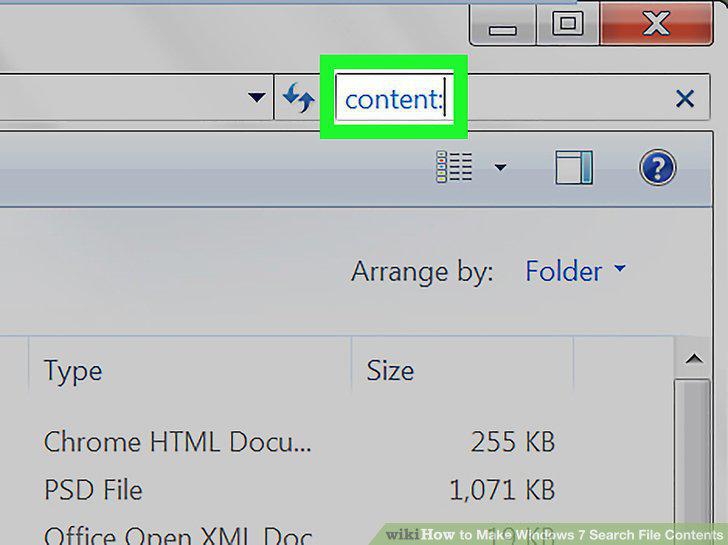
Enter the "content search" prompt.
4
Enter the content search term.
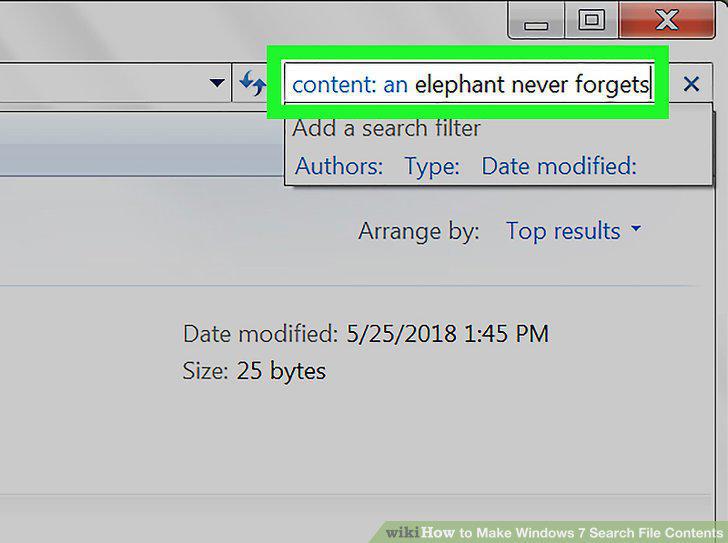
Enter the content search term.
5
Review the results.
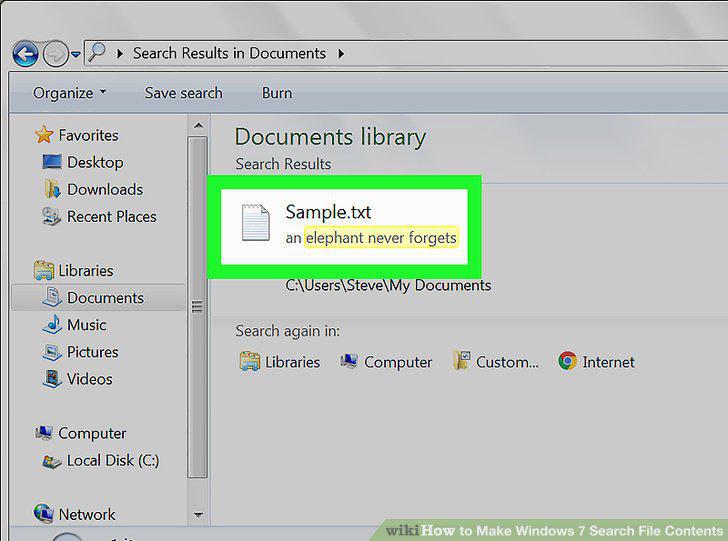
Review the results.
6
Open Start .

Open Start .
7
Type change search options for files and folders into Start.
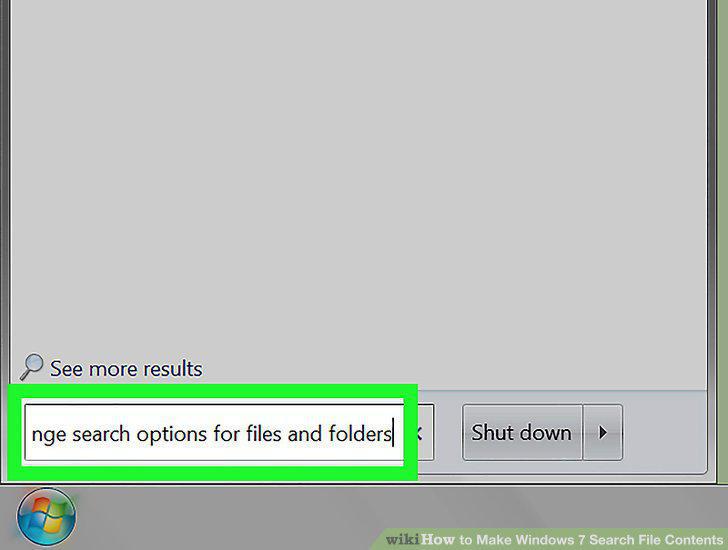
Type change search options for files and folders into Start.
8
Click Change search options for files and folders.
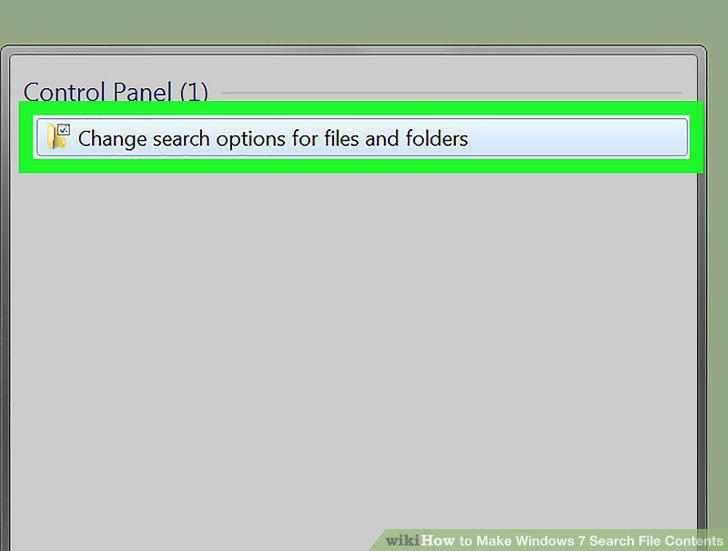
Click Change search options for files and folders.
9
Check the "Always search file names and contents" box.
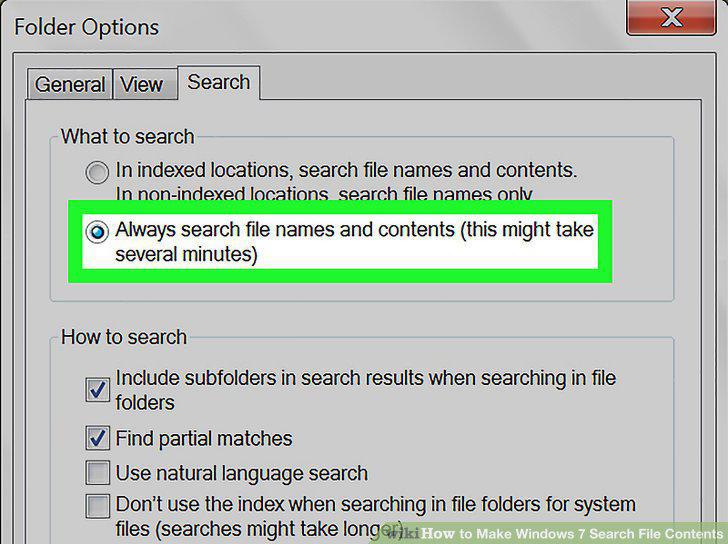
Check the "Always search file names and contents" box.
10
Click Apply, then click OK.
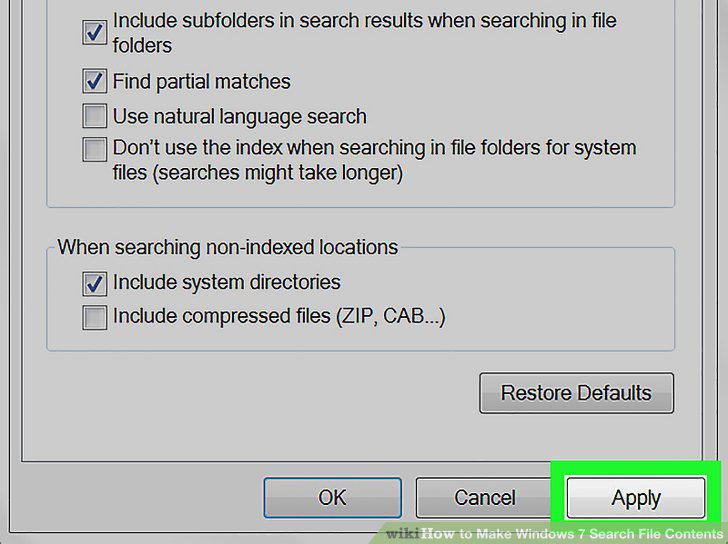
Click Apply, then click OK.
11
Open Start .

Open Start .
12
Type in change how windows searches.
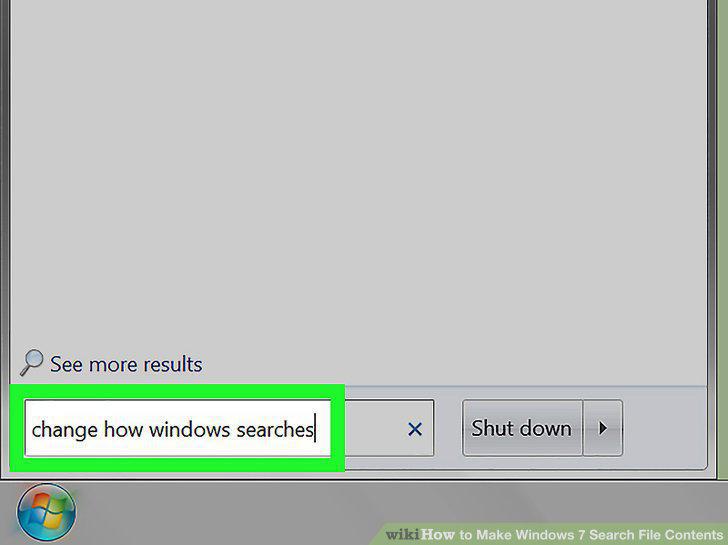
Type in change how windows searches.
13
Click Change how Windows searches.
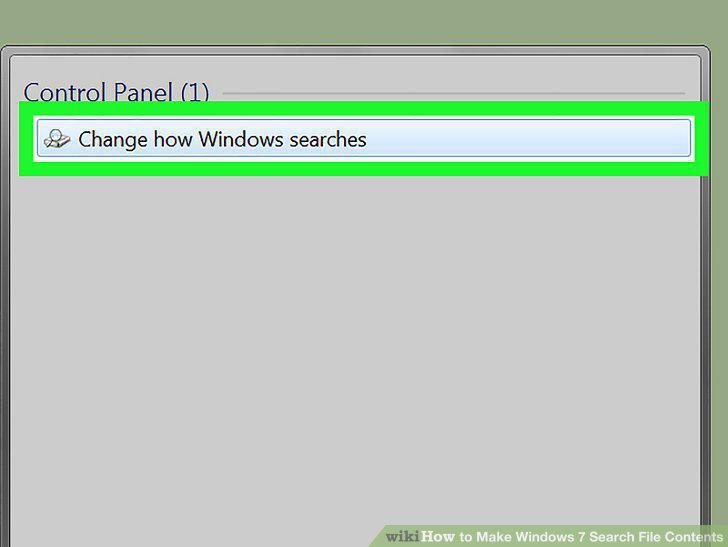
Click Change how Windows searches.
14
Click Advanced.
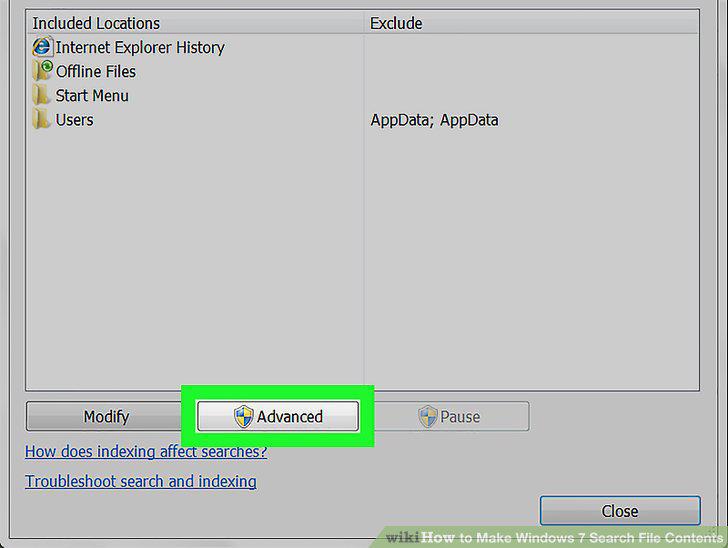
Click Advanced.
15
Click the File Types tab.
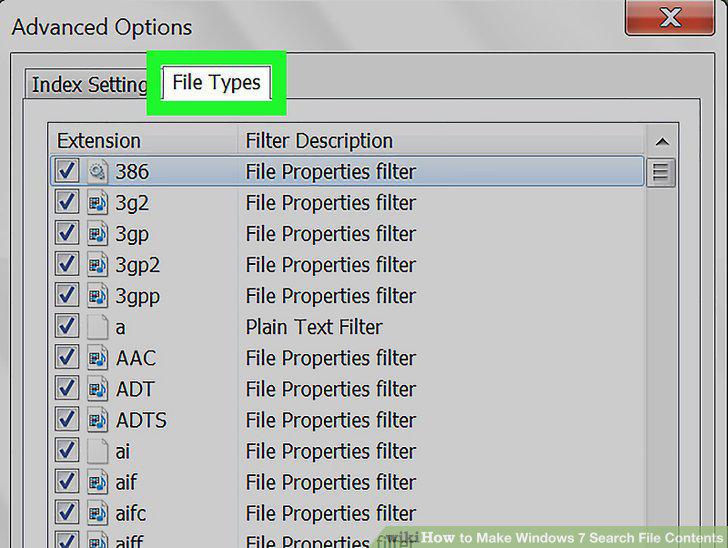
Click the File Types tab.
16
Select your preferred file type.
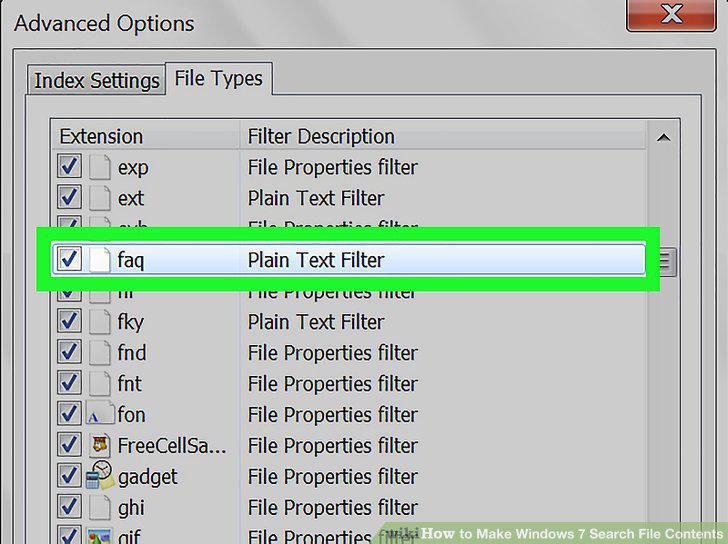
Select your preferred file type.
17
Check the "Index Properties and File Contents" box.
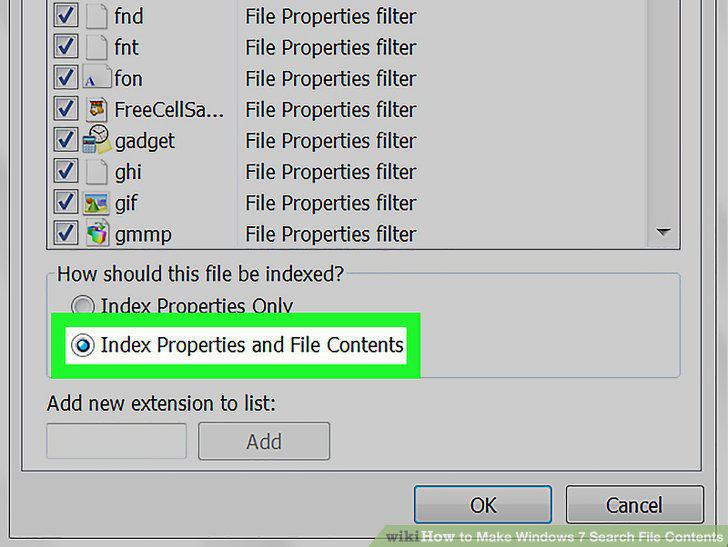
Check the "Index Properties and File Contents" box.
18
Click OK.
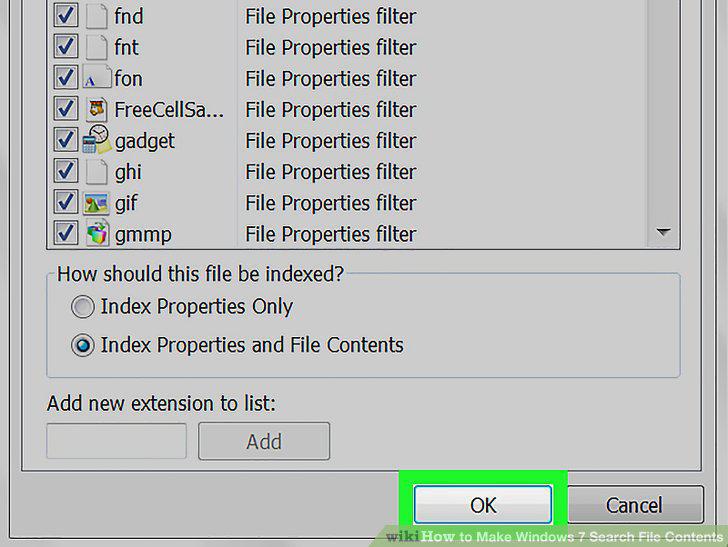
Click OK.
Comments (0)
No comments yet. Be the first to share your thoughts!