How to Fix a Leaky Toilet Tank
Turn off the water supply to the toilet.. Mark the water level in the tank with a marker or a pencil.. Add coloring or food dye to the water and wait 10 minutes.
Steps
Turn off the water supply to the toilet.
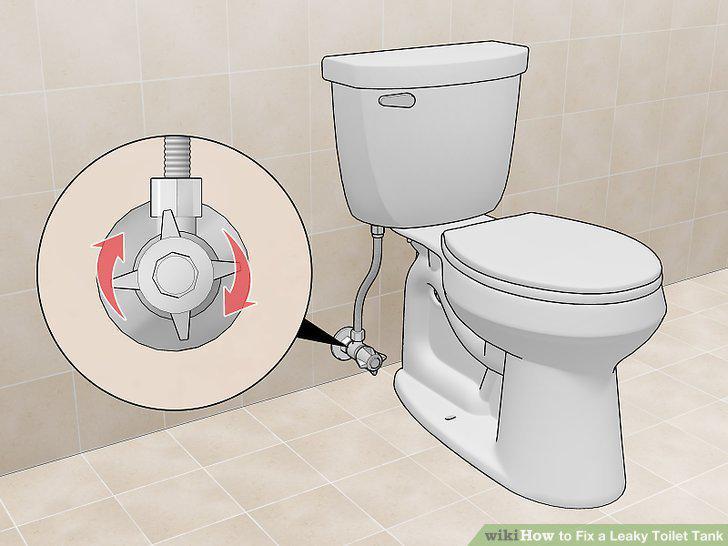
Turn off the water supply to the toilet.
Mark the water level in the tank with a marker or a pencil.
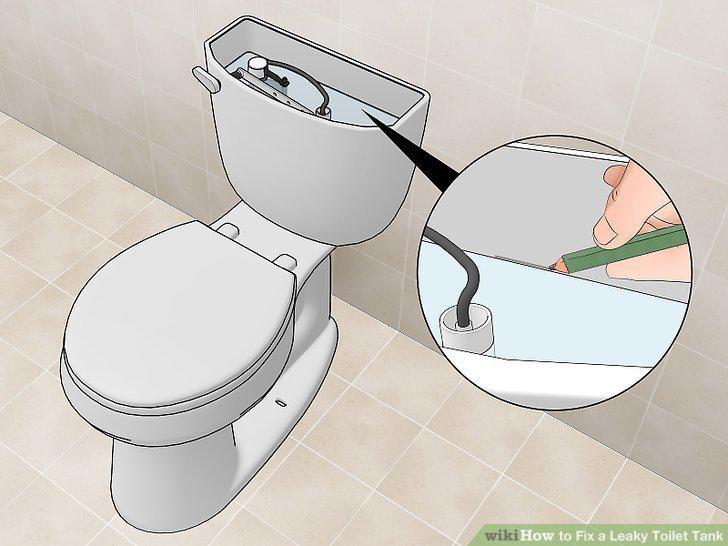
Mark the water level in the tank with a marker or a pencil.
Add coloring or food dye to the water and wait 10 minutes.
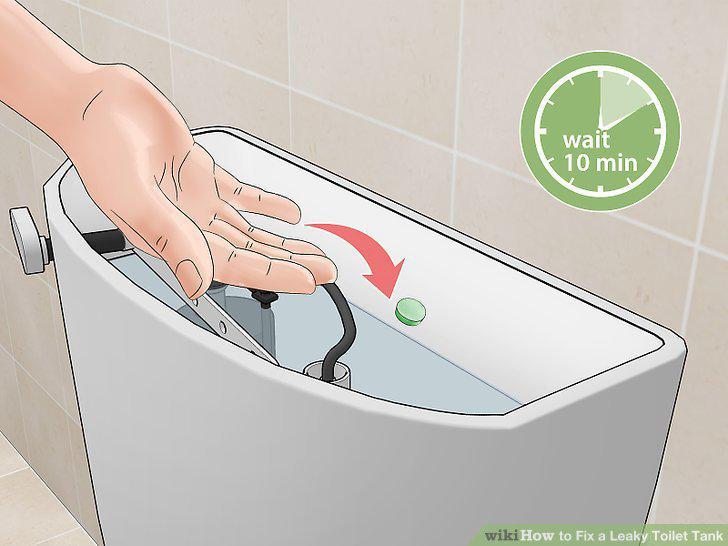
Add coloring or food dye to the water and wait 10 minutes.
Check the water in the toilet bowl to see if it's changed color.
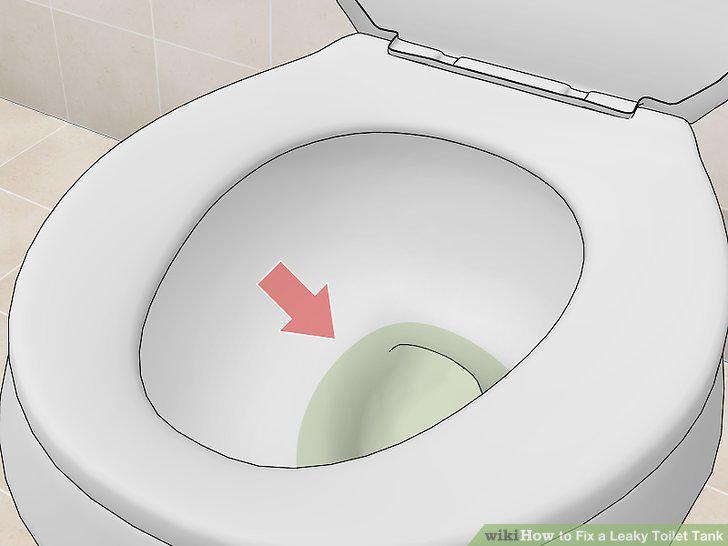
Check the water in the toilet bowl to see if it's changed color.
Look to see if the water level in the tank has gone up or down.
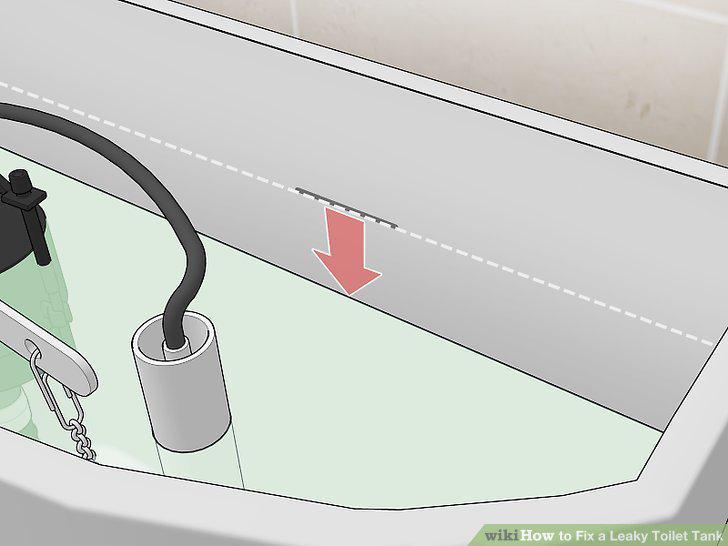
Look to see if the water level in the tank has gone up or down.
Check if the dyed water from the tank has leaked onto the floor.
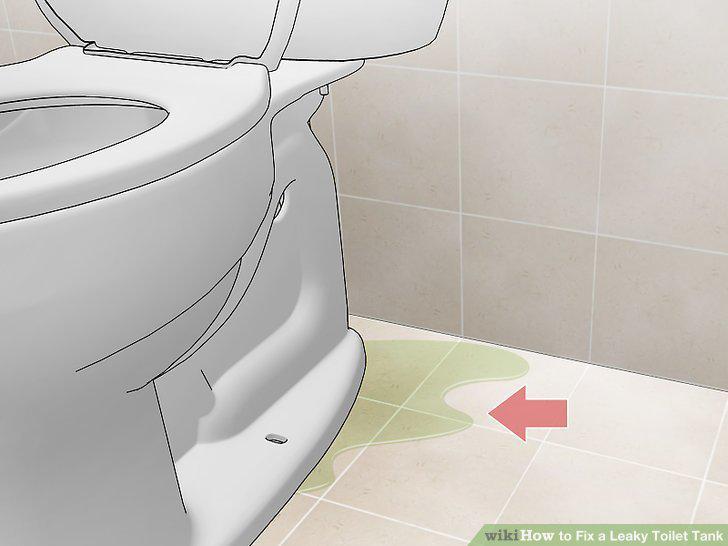
Check if the dyed water from the tank has leaked onto the floor.
Turn off the water supply to the toilet and flush it.
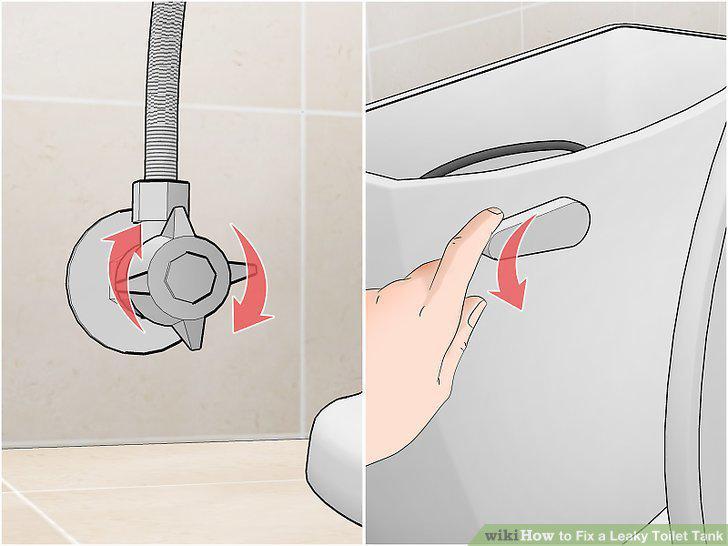
Turn off the water supply to the toilet and flush it.
Remove the nuts attached to the supply tube and to the toilet bowl.
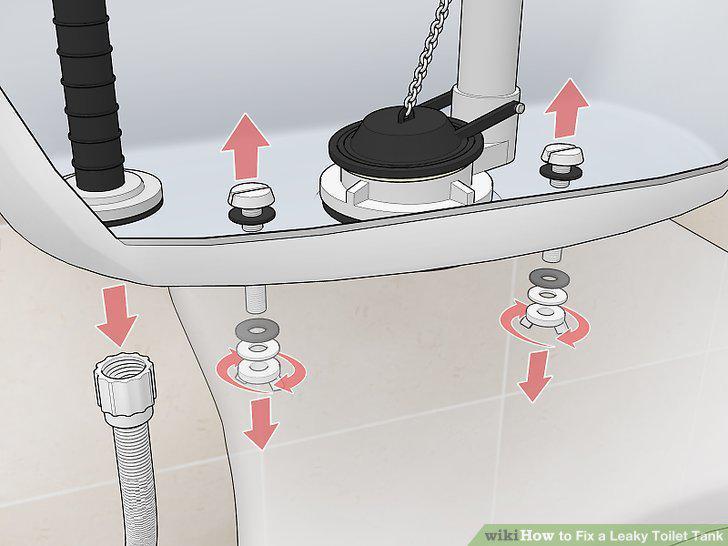
Remove the nuts attached to the supply tube and to the toilet bowl.
Lift the tank off of the bowl once the nuts have been loosened.
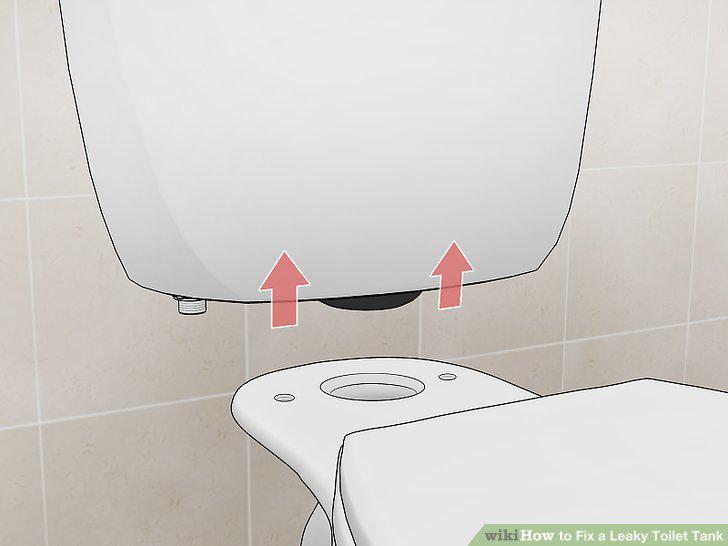
Lift the tank off of the bowl once the nuts have been loosened.
Unscrew the locknut on the bottom of the tank and remove the valve.
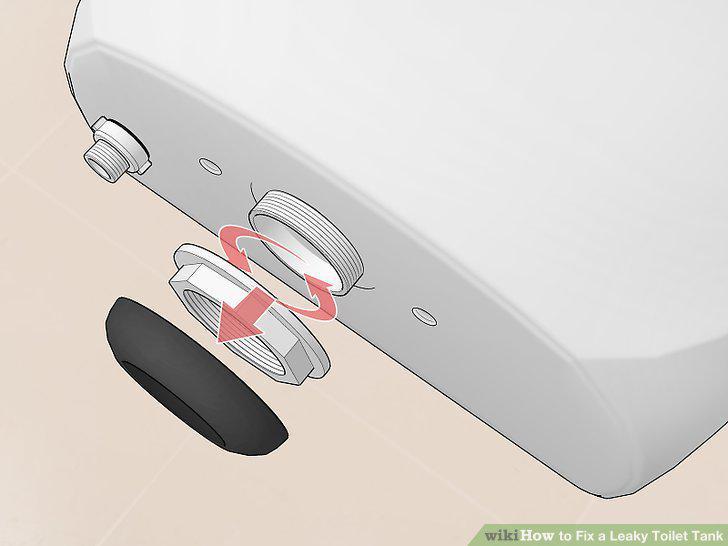
Unscrew the locknut on the bottom of the tank and remove the valve.
Place the new flush valve in the spot where the old valve was.
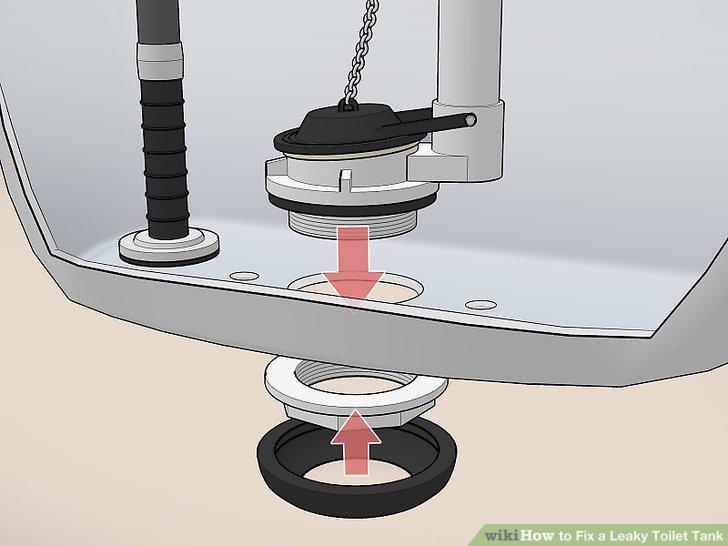
Place the new flush valve in the spot where the old valve was.
Tighten the locknut with a monkey wrench to complete the installation.
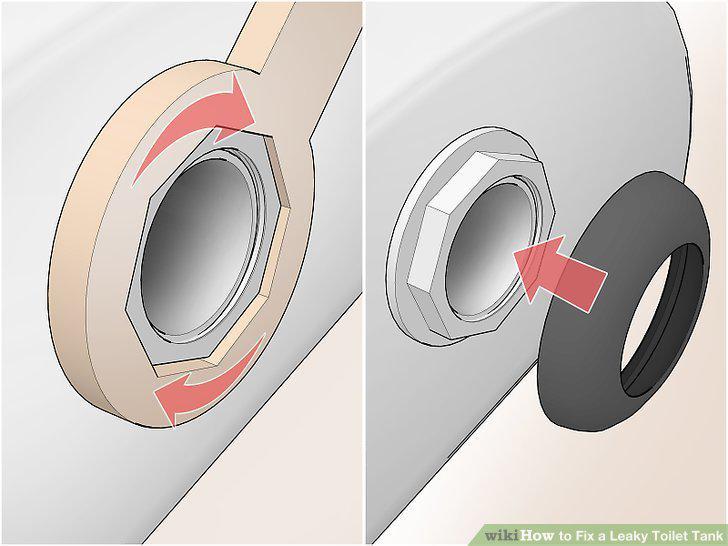
Tighten the locknut with a monkey wrench to complete the installation.
Place the tank back on the toilet and tighten the bolts.
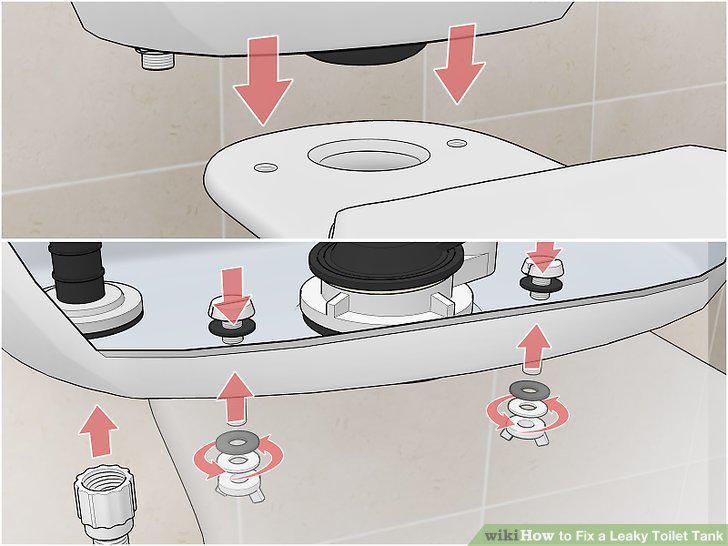
Place the tank back on the toilet and tighten the bolts.
Turn off the toilet's water supply and remove the water from the tank.
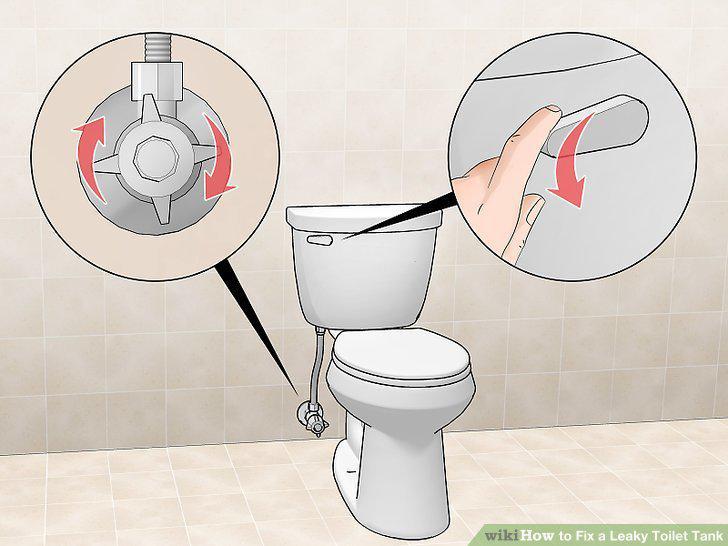
Turn off the toilet's water supply and remove the water from the tank.
Disconnect the water supply tube behind the tank.
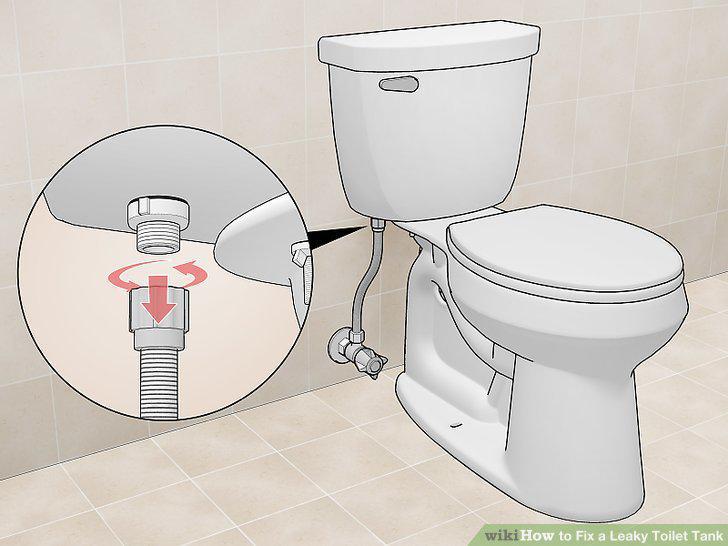
Disconnect the water supply tube behind the tank.
Unscrew the locknut attached to the fill valve on the bottom of the tank.
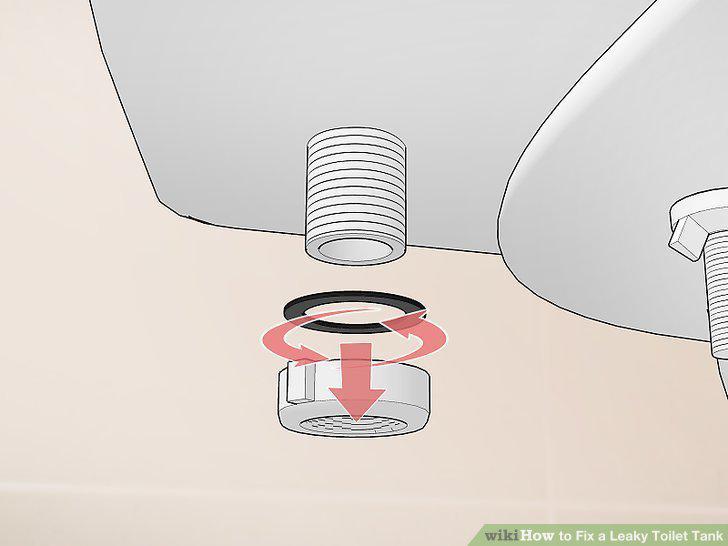
Unscrew the locknut attached to the fill valve on the bottom of the tank.
Remove the old fill valve through the top of the tank.
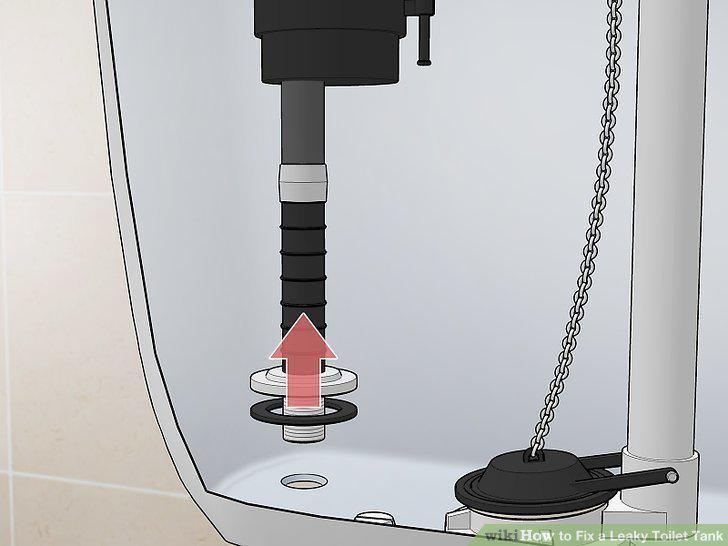
Remove the old fill valve through the top of the tank.
Place the new fill valve in the tank and install it per its instructions.
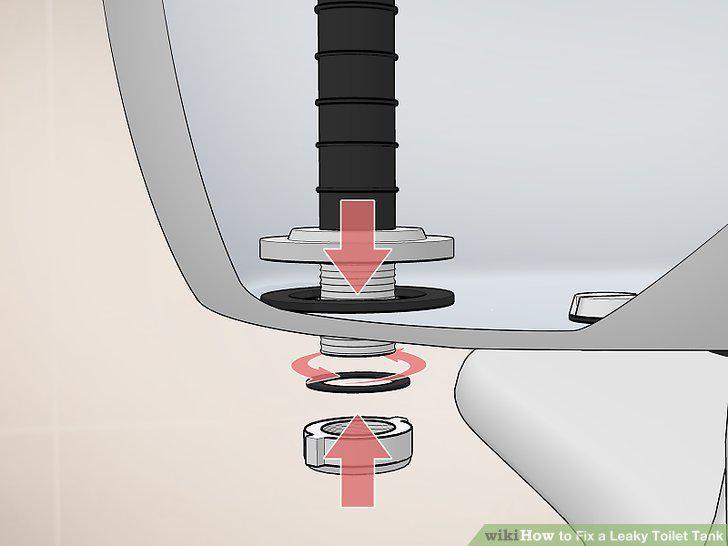
Place the new fill valve in the tank and install it per its instructions.
Reattach the water supply tube behind the tank and turn on the water.
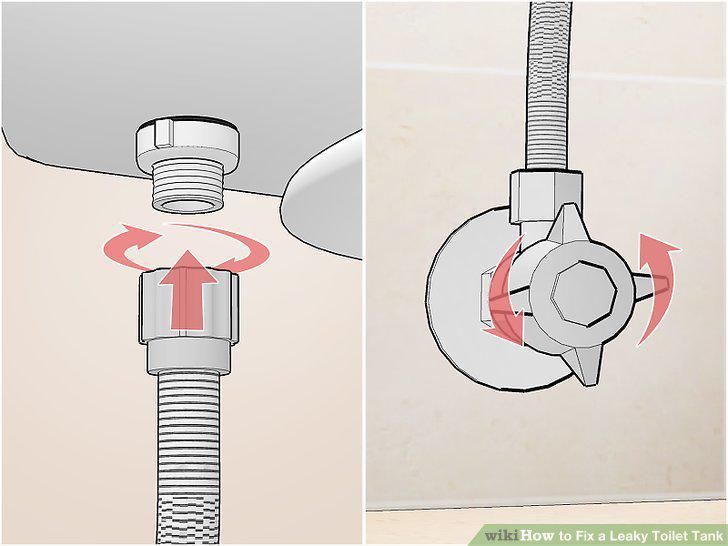
Reattach the water supply tube behind the tank and turn on the water.
Turn off the water and empty the water out of the tank.
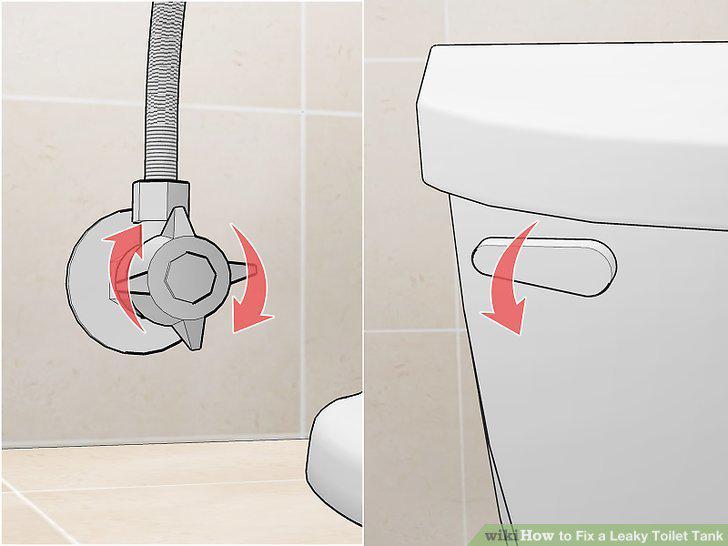
Turn off the water and empty the water out of the tank.
Locate the bolts in the tank that connect the tank to the bowl.
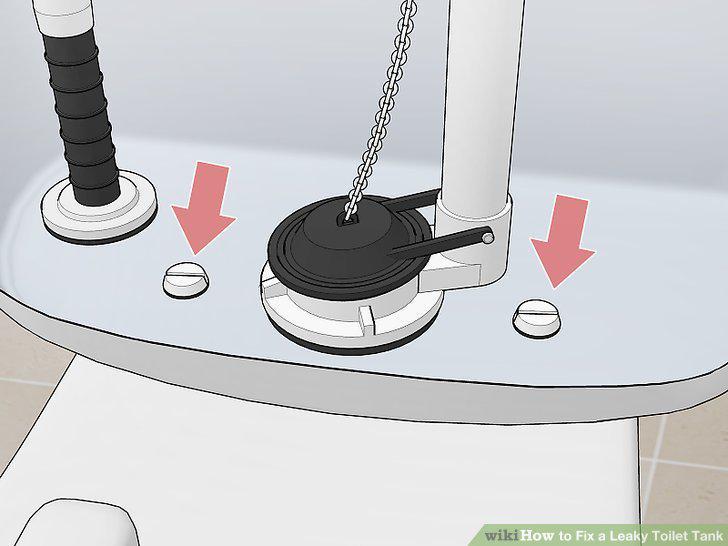
Locate the bolts in the tank that connect the tank to the bowl.
Use an adjustable wrench and screwdriver to tighten these bolts.
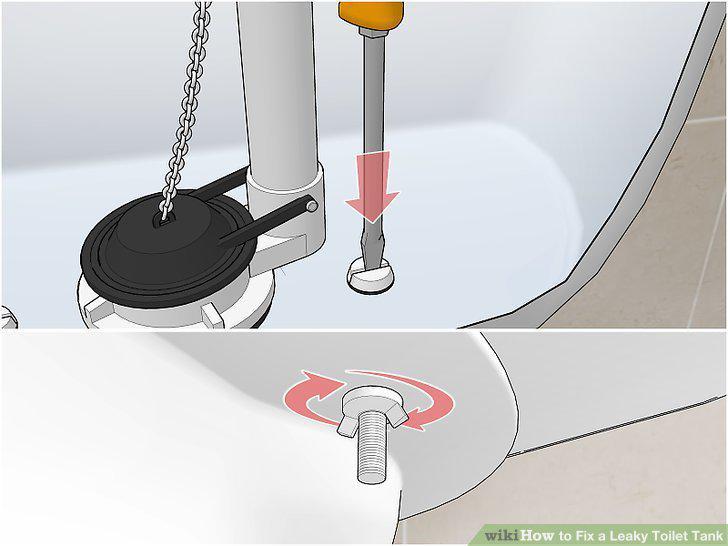
Use an adjustable wrench and screwdriver to tighten these bolts.
Refill the tank and check for leaks coming from the bolts.
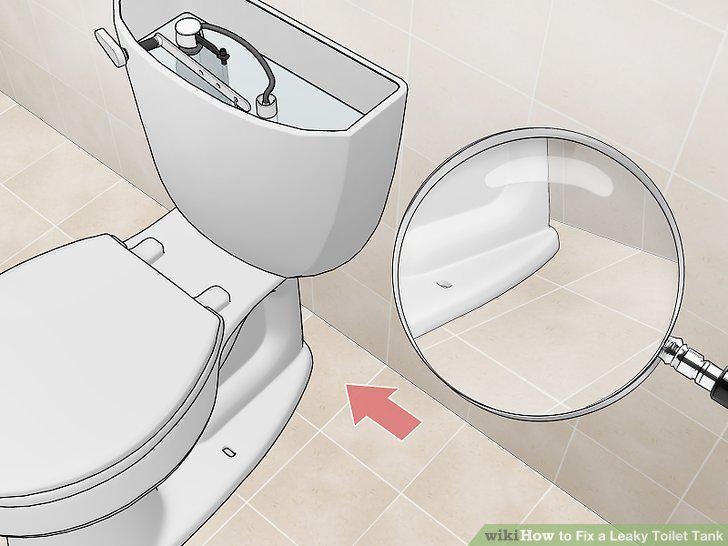
Refill the tank and check for leaks coming from the bolts.
Comments (0)
No comments yet. Be the first to share your thoughts!