How to Insert a Check Box in Word
Open a new file in Microsoft Word.. Click on File in the menu bar and then Options in the menu.. Click on Customize Ribbon and then Main Tabs in the "Customize the Ribbon:" drop-down menu."
Steps
1
Open a new file in Microsoft Word.
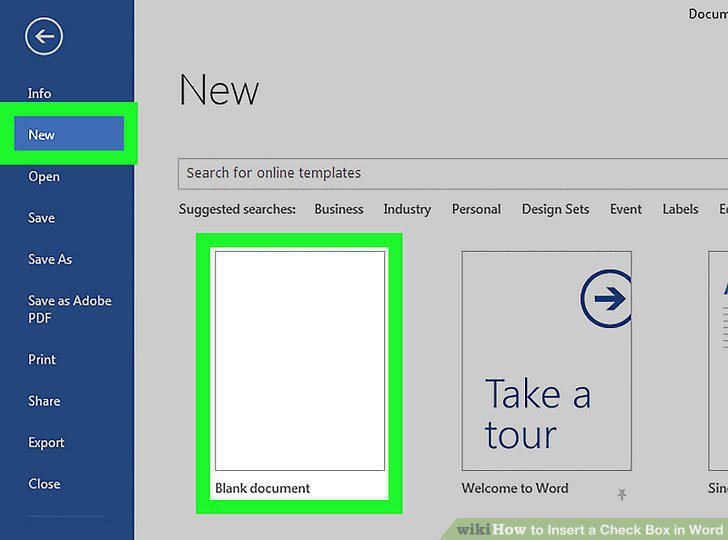
Open a new file in Microsoft Word.
2
Click on File in the menu bar and then Options in the menu.
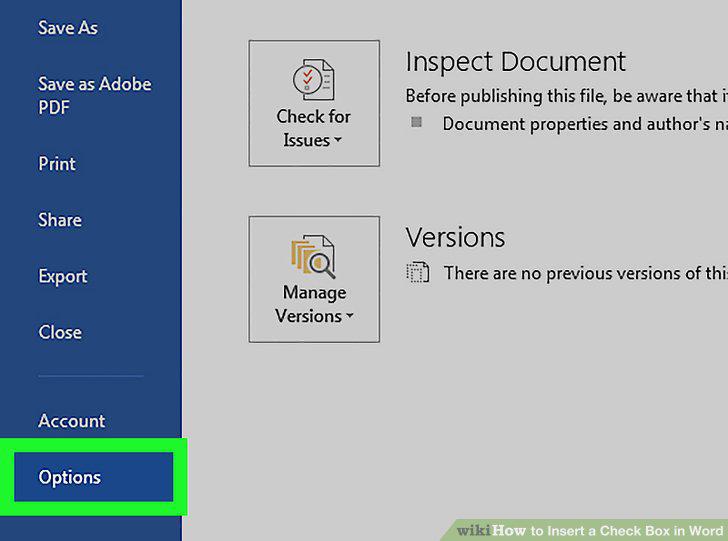
Click on File in the menu bar and then Options in the menu.
3
Click on Customize Ribbon and then Main Tabs in the "Customize the Ribbon:" drop
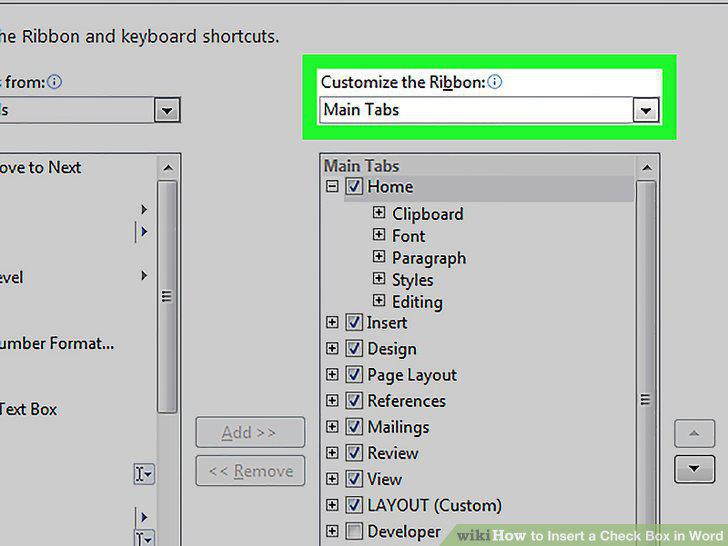
Click on Customize Ribbon and then Main Tabs in the "Customize the Ribbon:" drop-down menu."
4
Check "Developer" in the "Main Tabs" pane.
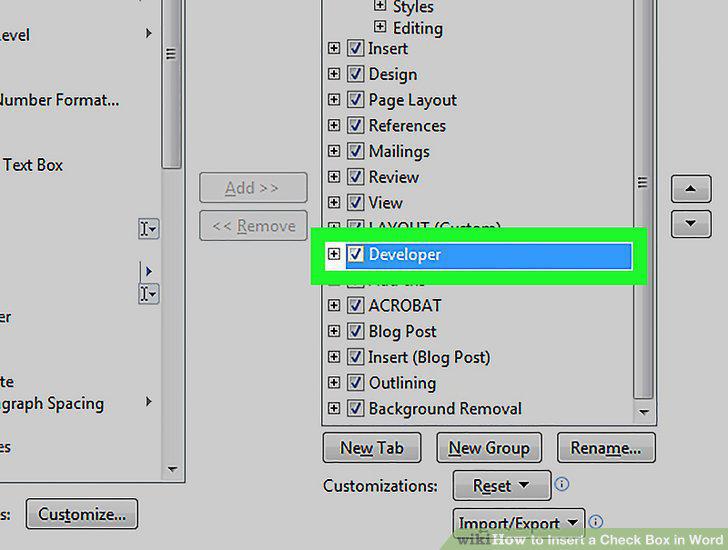
Check "Developer" in the "Main Tabs" pane.
5
Click on Ok.
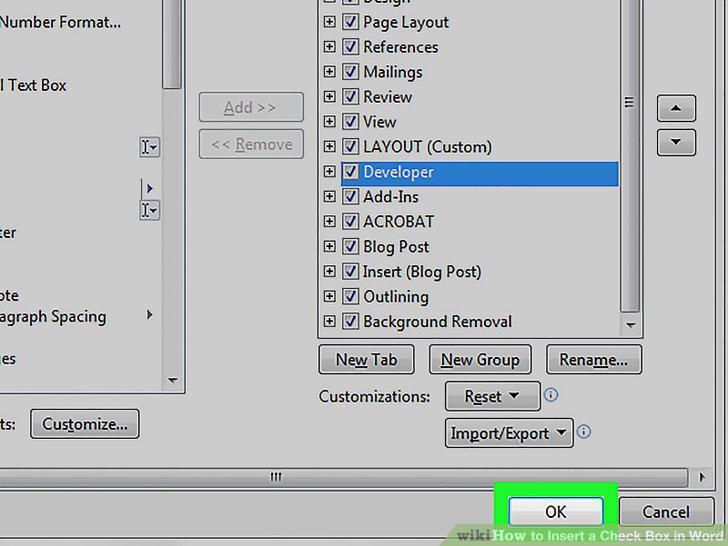
Click on Ok.
6
Click on Developer.
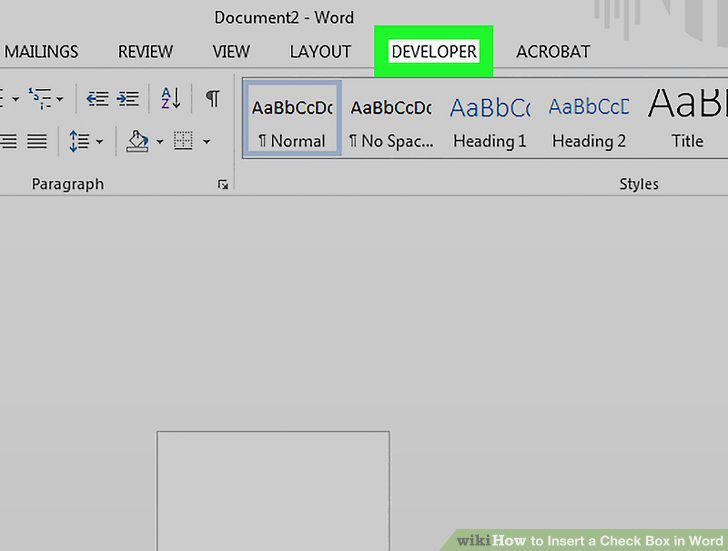
Click on Developer.
7
Position the cursor where you'd like to insert the check box.
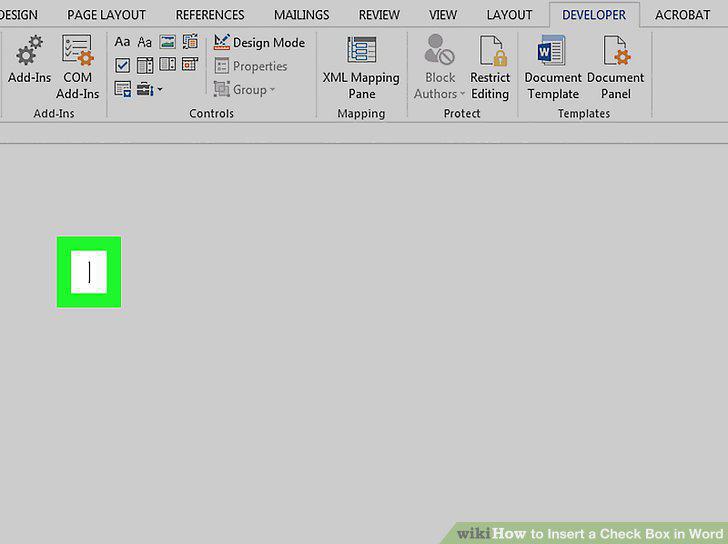
Position the cursor where you'd like to insert the check box.
8
Click on Check Box.
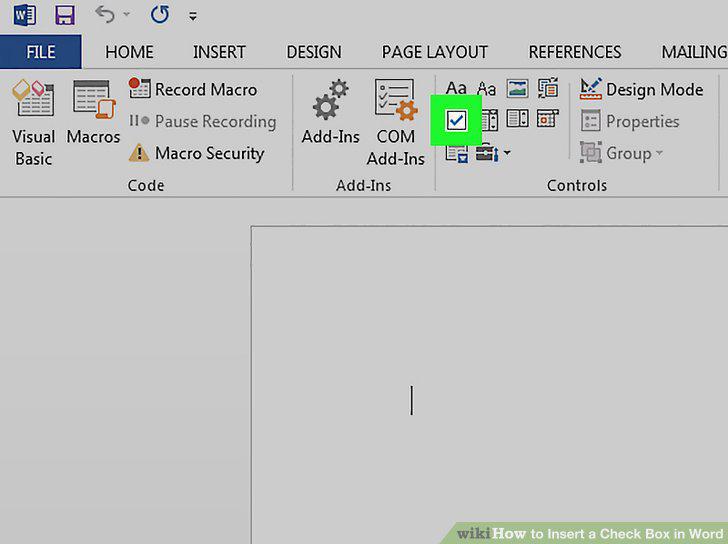
Click on Check Box.
9
Add additional check boxes and text as needed.
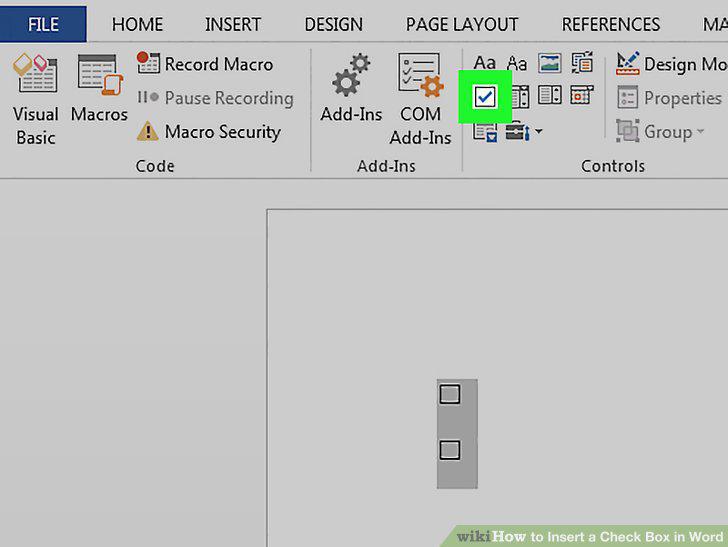
Add additional check boxes and text as needed.
10
Lock the form.
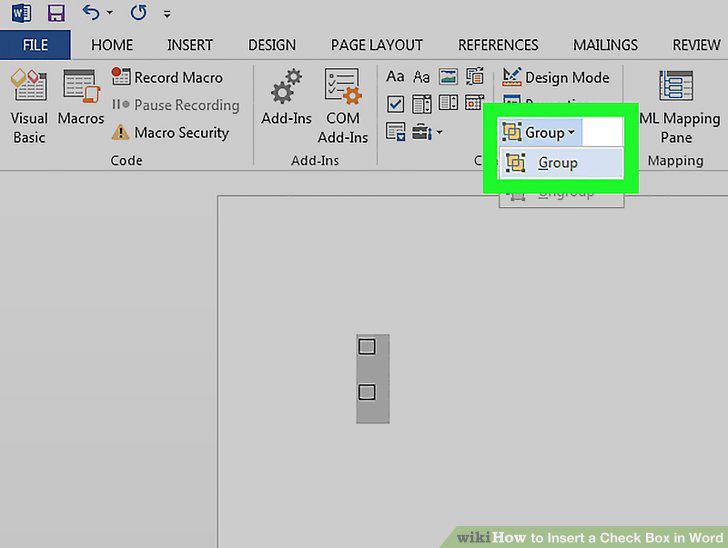
Lock the form.
Comments (0)
No comments yet. Be the first to share your thoughts!